Showing posts with label Cece Caldwell Paints. Show all posts

Thursday, May 16, 2013

ARRANGING AND REARRANGING

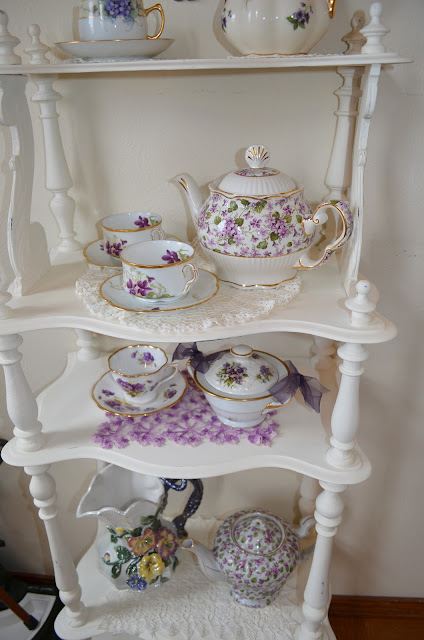
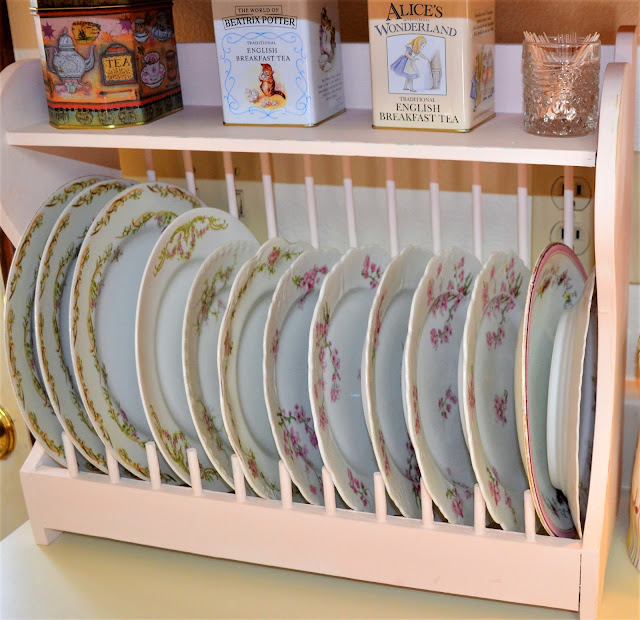
I love to change things - you know - change the location of a teapot or cup and saucer.  I have been playing with my new Shabby Armoire and can't resist sticking more in here or there.  These best part is that I finally have room for my cake platters!


My husband has done a great job
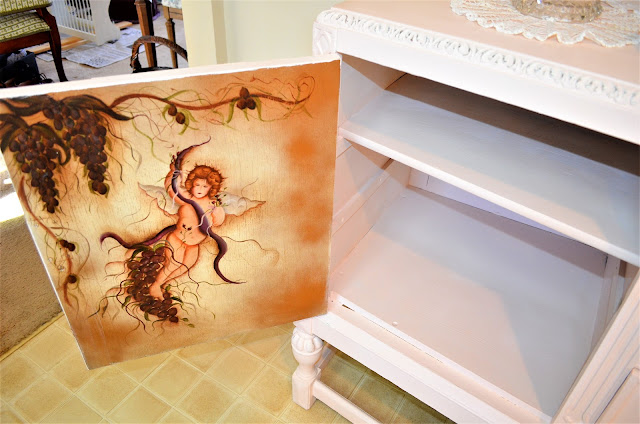
painting a lot of our furniture
pieces which are mostly vintage and
some antique.


This week we have been getting a new furnace and air conditioning at our home and I am so happy that the wall thermostat was moved out of the kitchen where it was in a terrible location.  Of course, now the wall has to be patched and painted.

Thursday, May 9, 2013

SHABBY CLOCK AND FLORAL


Our Victorian Wall Clock just 
went Shabby Chic:


As many of you know, beginning a number of weeks ago, we decided to change things at our house where dark Victorian prevailed.  I am loving the transformation to lighter colors that seem more "cottage".  


The clock was completely taken apart which was a little scary but it is working great!


I am also sharing this silk floral I did this week with stuff I had on hand.  I love these vintage flower baskets. I want to tell you
 to be sure and pick up a copy of the June 
issue of Romantic Homes - a special tea is included with the theme: Downton Abbey.


And lastly a little Victorian Marble Table my husband painted:


Tuesday, May 7, 2013

OUR KITCHEN TABLE HAS A NEW LOOK

I am so excited that May is finally here even though it snowed all day on Tuesday May 1st and our temps are still only in the 50's now! 


We had a little painting slowdown while I was gone to Virginia for a week but we are now done with our antique oak kitchen table and four chairs.


 I knew I would like seeing this piece white because I have always loved this 45" square table. We bought it many years ago at an antique mall in Conroe, Texas.  This table offered no problems painting with it's center leg and 4 large curved legs.   Again, we used the Vintage White Cece Caldwell chalk paint.   I am glad to get this done because we have been eating on a card table in the den for weeks.  Even the basket in the center of the table was painted with chalk paint!

Thursday, May 2, 2013

PAINTING PHOTO FRAMES WITH CHALK PAINT

Several weeks ago I spread the kitchen table with newspapers and began gathering up the picture frames around the house. I took the photo and glass/backing out.   Some were metal and others plastic.  Some were that old out of style 1970-1980's resin look.  I had decided to paint them with chalk paint and I found that 1 coat was basically all it took, a little distressing with sandpaper (or just wiping some of the wet paint off with a rag) and a quick wax job and buff.


You can totally change the look of your frames easily!


Thursday, April 4, 2013

SHABBY CHIC MIRROR ON THE WALL

I have a few more "Shabby Chic" items to share today - things that go on the wall!    We have lots of  furniture pieces in the works yet to share but for today I am sharing some mirrors, the stained glass framework and picture frames that got painted.


This large mirror in  the dining room up above turned out just the way we wanted, also the antique stained glass piece that hangs in the window and the frame on the faux oil picture on the wall (End of The Dinner Party) and the frame on the rose oil painting over the buffet in the kitchen.


I have to tell you something funny.  I bought this mirror below around 1976 when it was white.  Later we painted it gold - now here we are turning it Shabby Vintage White again. 


 Also a tip for mirrors:  you have to ALSO PAINT the inner back circumference of the frame with the same paint several inches from the edge all the way around because after putting the large mirror back in the frame  we realized the mirror reflects that area about 1" and if it is dark or another color - it shows that in the reflection.  Who would have known?


Tuesday, April 2, 2013

APRIL SHOWERS BRING: SNOW OR RAIN?

At our house we have a clutter everywhere because of projects going at many levels at home.  It might even snow today - or rain or snow?  This would be wonderful as watering restrictions officially kicked in yesterday because of the drought.


This what-not-shelf to the left in the collage below is the second one my husband just finished doing shabby chic Vintage White.  Now there are 2 - one on each side. The stained glass is missing from the window because it is in the assembly lineup.

My curiosity got the best of me
to see how some tea wares and
china would love with the coming
lighter look.


I had to take select photos this morning because I meant what I just said - their are pictures off the walls, mirrors off the walls and pieces of furniture at various stages sitting around.  As many of you know - Shabby Chic has finally arrived at my house.  It is a WORK IN PROGRESS. 


 I did get Mr.  Bunny out of the basement
 and put him on the buffet.

Monday, April 1, 2013

ENJOYING MY "NEW" KITCHEN BUFFET

I have to admit - I love my "new" shabby chic pink kitchen buffet (some say sideboard).  I have also found pleasure in staring at the lilies blooming in the arrangement on it.


Now that we are on a painting "roll" we are learning some things many of you already knew.  One example:  facing the challenges of working with mahogany turning it shabby chic......more to come on that note.


I love how my tea wares show up
on the light background of paint
color.

Friday, March 29, 2013

SHABBY CHIC PROGRESS REPORT

Originally we were going to wait until retirement to redo our antique furniture into the fresh Shabby Chic look.  After seeing so many wonderful shabby chic projects on your blogs - I convinced my hubby it was time now to go for it. We did the drying rack over my kitchen sink with Vintage White which is the color we are using most:


This is one of three what-not-shelves my
husband has been working on and the easiest one to do:  


 The piece had a black finish on it like a Victorian ebony I am sure - very, very old but we didn't have to sand it.  It stands by my front door.  We don't live in a big house so our furniture is scaled smaller.  If you have a huge house and entrance foyer this would look ridiculous but it works here in my small foyer. 


Thursday, March 28, 2013

NO TURNING BACK NOW!

We have been on a roll of transformation at our house -  a painting shabby chic roll!  It is so exciting to begin with a new fresh look.  We have the kitchen cleared out to allow room where a number of projects are in process. 


 This is the first of three  "what not shelves" we have worked on with Cece Caldwell Chalk Paints.  Two more are in process along with numerous other pieces of furniture. 


 We are using the Annie Sloan brushes to paint with which are round and work well. Hubby is doing most of the work.   After they are painted, then they are distressed  (we are going with a light distress) and then they are waxed and buffed.   Earlier in the week, I posted our 1st piece, the buffet that my husband  painted very light pink.


Also - another paint job - a simple plate rack 
that sits
 on the kitchen counter.

Monday, March 25, 2013

FINALLY SHABBY CHIC ARRIVES

Do you remember the line in White Christmas where Bing Crosby says to Danny Kay: "pushing, pushing" because Danny is trying to push him into a relationship with Rosemary Clooney?  Well, I have been "pushing-pushing-pushing" my hubby for quite a while to start turning our furniture into "shabby chic" and to create more of a cottage feeling in our home. 

 Much of what I have had going on in my house goes back to the Jewel Tone Embrace of the late 80's.  At that time it was a love for Victorian and the deep colors of royalty. My kitchen buffet below I bought years back when a darling shop closed nearby and I purchased their golden display piece. Well...change has come:


The color is very light pink.


Back in the late 60's  we learned to refinish antiques it was truly the hard way. You had to use this stuff called "strip-ese" and believe me - it burned like crazy on your skin.  However, shabby chic and especially the chalk paint idea is really easy by comparison.  This is our first shabby chic chalk paint project.  This was the look before which was very Victorian:


  We kept the painting of angels on the inside of the 2 doors and my perfectionistic husband painted all inside the piece and even the back which had never been fully painted.


We watched a lot of tutorial videos over and over on line and then we jumped right in (yes - I painted too!) and did the buffet with chalk paint.  We did settle on Ce Ce Caldwell paints because my husband has a lot of allergy issues.  We painted in the kitchen and there was NO ODOR AT ALL!  This is Portland Rose over a first coat of Vintage White.  I also liked the made in America part as most everything we buy now seems to come from China.    


My husband is willing to redo more of our vintage and antique pieces so there will be more show and tell to come! We have quite a few pieces in process.  I am so excited as I am ready for a new "fresh" but still "old" look.  I can't wait to see those corner curios changed - and the kitchen table and the book case and the tea cart and..........we better get busy.